


If you're interested in painting stripes, here are some details on the method I used to measure the stripes and all that jazz. The wall behind our bed was already painted white so all I needed to do was add the gray stripes.
Picking paint colors in our household is not a simple task. I mean, we picked the blue color that I refer to as smurf blue. It's not the worst, but it's certainly not what I had in mind. Let's just say Brit and I have different visions, and when we try to compromise, we get Smurf. So when picking this color, Brit trusted me implicitly, or so he said. Anyway, we decided to go with Benjamin Moore's Metro Gray. However, rather than paying $50+ for Mr. Moore's paint, we took the color to Home Depot, did a color match, and got it for almost half the price {insert victory dance}. We used Metro Gray and White for the stripes and Graytint to cover the remaining blue walls.

Determine the Size and Location of the Stripes
First I measured the wall. Our wall is 96 inches floor to ceiling, excluding the baseboard. Based on our room size, I felt that 16 inch stripes would look just right in our space. At first my anal retentive self wanted the stripes to fit perfectly on the wall. Meaning that if I had 16 inch stripes, I wanted to perfectly be able to paint 6 stripes at 16 inches {16x6=96}. Unfortunately for me, I also wanted stripes that wouldn't cross through our headboard or lampshades at an awkward location {see pictures below to get a better idea about what I'm talking about here}.
So I toyed around with different sized stripes to see if I could come up with a formula for equally sized stripes along the wall that would not look off balance with our furniture. After about 30 minutes of measuring, and calculating, and measuring, and calculating, I gave up on my idea of fitting stripes perfectly on the wall. I accepted the fact that if I want our 16 inch stripes to look balanced, there may be a 10 inch stripe at the top or bottom of the wall and it probably wouldn't kill me {probably}. So instead, I determined where I wanted the stripes based on our furniture, and went from there.
So I toyed around with different sized stripes to see if I could come up with a formula for equally sized stripes along the wall that would not look off balance with our furniture. After about 30 minutes of measuring, and calculating, and measuring, and calculating, I gave up on my idea of fitting stripes perfectly on the wall. I accepted the fact that if I want our 16 inch stripes to look balanced, there may be a 10 inch stripe at the top or bottom of the wall and it probably wouldn't kill me {probably}. So instead, I determined where I wanted the stripes based on our furniture, and went from there.

^^notice how the stripe hugs the lamp shade?
Am I the only one who would ever notice something like that?
Measure and Trace the Stripes
After determining the first stripe location, the rest was, dare I say, easy. I used a level ruler and penciled off the lines. Turns out, our walls aren't that straight, go figure. So the level ruler really came in handy! As I would draw the line, I would measure the height of the stripe to make sure it remained at 16 inches. This process is a little tedious but trust me, you'll be glad you took the time.
The Tape
This is the one thing Brit weighted in on. He encouraged me to purchased this green FrogTape {even though we already had plenty of blue painter's tape}. I'd be lying if I said I wasn't just a little irked that he was sooo opinionated on this when he wasn't even going to be using it, but, he was right {ugh}. This tape is amazing and I would not recommend anything else when painting lines or even trim.
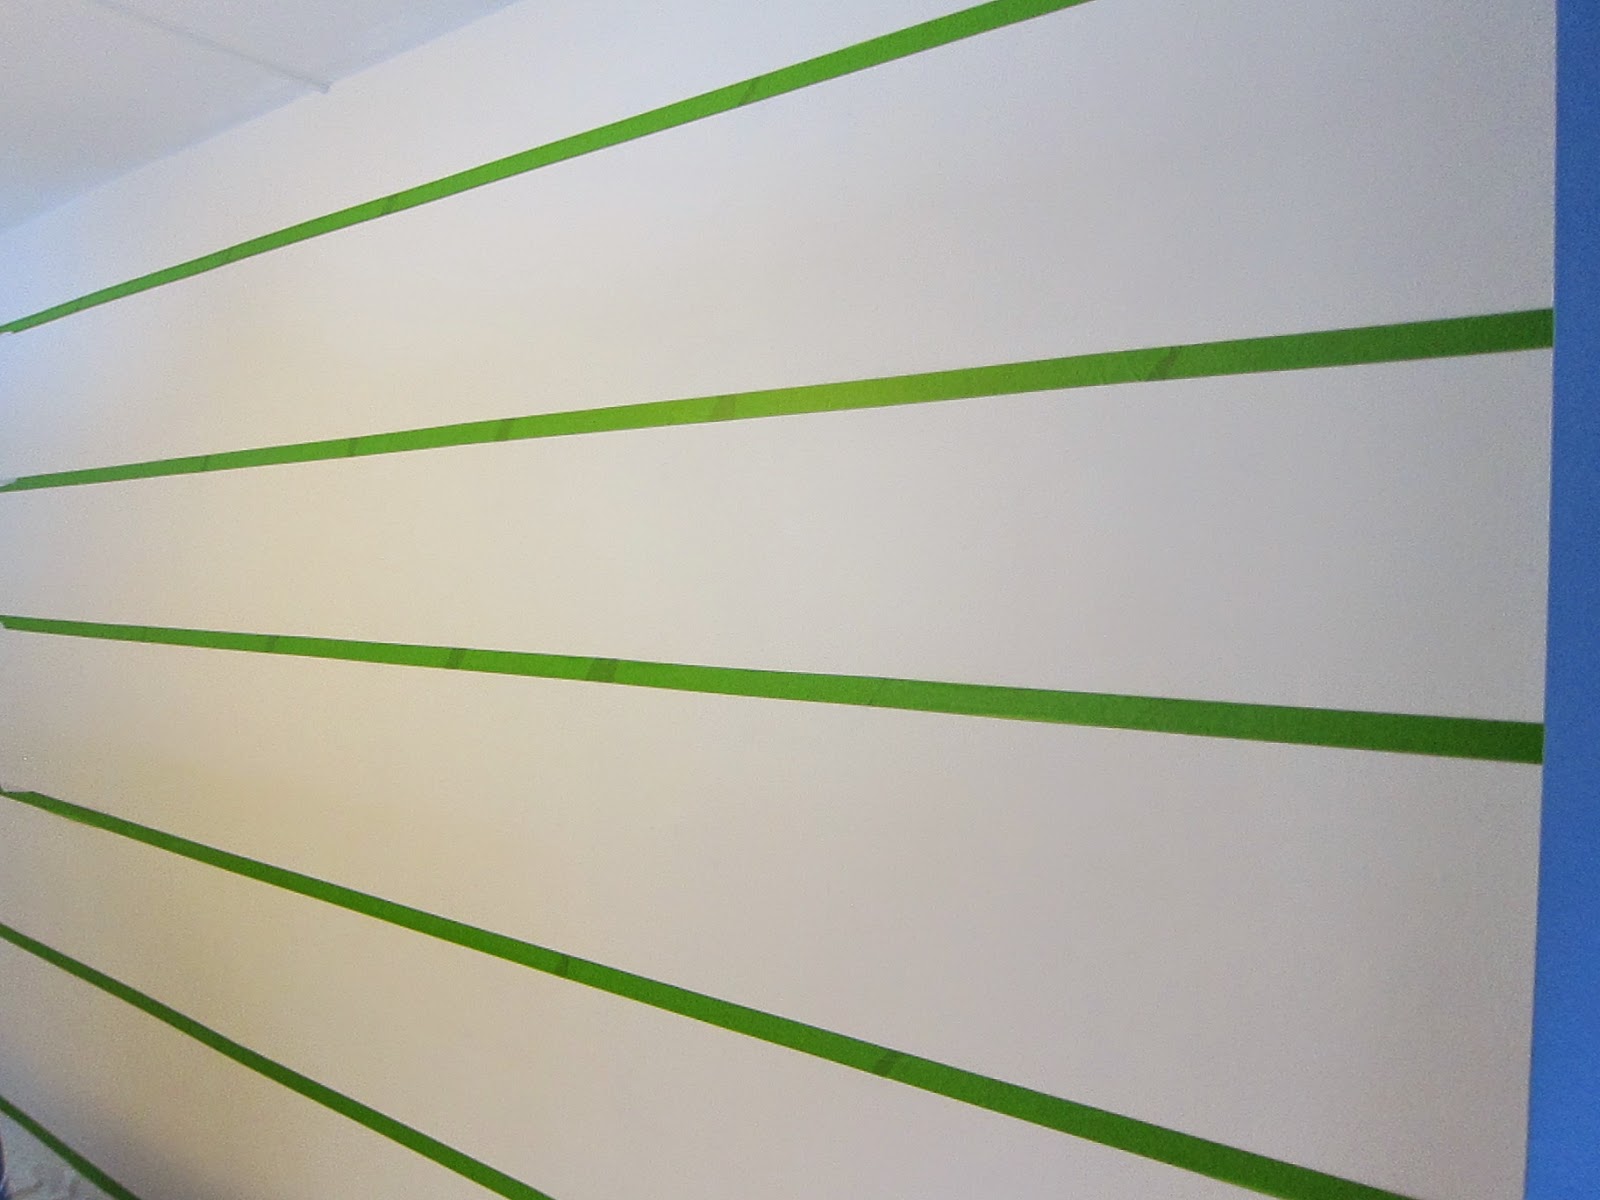
 Tape Along the Line
Easy enough, right.

Begin the Painting!
Start by painting along the tape with the base coat {here the base coat is white}. This is done to fill in any gaps or bubbles that may be in the tape. Although with the FrogTape, I'm not even sure this step is necessary. I wasn't willing to take any chances this time, though!
 Wait for the paint to dry {about an hour}, then paint the color of your stripes!
 Remove the tape and stand back in awe.


 Do you see what I mean about the stripes and the furniture? I felt that if the stripe didn't hit either perfectly around the shade or exactly down the middle, it would just look odd. Maybe not. Maybe I'm just odd. Nonetheless, we just need to make sure we don't get new lamps or shades anytime soon.
After determining the first stripe location, the rest was, dare I say, easy. I used a level ruler and penciled off the lines. Turns out, our walls aren't that straight, go figure. So the level ruler really came in handy! As I would draw the line, I would measure the height of the stripe to make sure it remained at 16 inches. This process is a little tedious but trust me, you'll be glad you took the time.
The Tape
This is the one thing Brit weighted in on. He encouraged me to purchased this green FrogTape {even though we already had plenty of blue painter's tape}. I'd be lying if I said I wasn't just a little irked that he was sooo opinionated on this when he wasn't even going to be using it, but, he was right {ugh}. This tape is amazing and I would not recommend anything else when painting lines or even trim.
Easy enough, right.
Begin the Painting!
Start by painting along the tape with the base coat {here the base coat is white}. This is done to fill in any gaps or bubbles that may be in the tape. Although with the FrogTape, I'm not even sure this step is necessary. I wasn't willing to take any chances this time, though!


That's it! Honestly. The instructions on the FrogTape tape also tell you to remove the tape as soon as possible. I nearly did a dance when I read that. My least favorite part about painting is having to wait to remove the tape before I can see my final product. It's like watching paint dry {sorry, I couldn't help it}.


Cost: Paint, two gallons at $27 a piece {1 Metro Gray, 1 Graytint. We already had the White paint}. Tape, just about $6. For a grand total of $65 for the entire room.
Time: To completely finish painting the stripes it took me two days {meaning two days after I got home from work}. So about 2 hours to measure and outline where the stripes were going to go. Then two hours the next day to paint the stripes {plus 1 hour drying time for the base coat}.
Have you tackled any new paint project lately? How are your New Year's resolutions going so far?
Thanks for visiting!

No comments:
Post a Comment
Thank you so much for commenting! All comments are submitted for moderation. Check back soon to view your comment!