Hey guys! It may have taken me a while, but here is the post I promised!
This time of year we receive close to 10 catalogs a week filled with amazing holiday decorating and gift ideas. I flip through and wish I had a money tree so I could fill our home with all of these amazing holiday decorations.
Since we definitely don’t have
a money tree {and if we did, it probably wouldn’t survive long with my green
thumb}, I try to do a lot of DIY decorations and gifts in our home. Here are
just a few that are being added to our home this year. They are super simple, ridiculously cheap, and make great gifts to someone in this season of giving.

Letter Ornaments
I saw these adorable ornaments in one of the eight thousand Pottery Barn catalogs we've received thus far {is there an unsubscribe button on catalogs?}. I love it's simplicity and charm, and how it sparkles on the tree. I love it so much, I decided to make some for a few people on my gift list.
 Here's how to make your own!
Stencil the letter, or letters, you want to use on a piece of cardboard, sturdy paper, or a paper plate {which is what I used}. Cover it with glue. Add glitter.
Brit calls glitter the herpes of crafts, so I sprayed mine with some shellac to prevent the glitter from falling off and getting everywhere. It made the ornament more durable as well.
 I punched a hole in the top, and thread some twine through. Although the ornament at PB is under $4, this was $0 because I had all the supplies on hand. And it took about 10 minutes, which is way faster than a trip to the shop would take me.
 Monogram Ornament
These are another inspiration from Pottery Barn. I picked up a 6-pack of ornaments from Michael's for $3 and created my own.
 They were even easier than the letter ornaments. Just three simple steps!
 Stencil the letter. Fill in the stenciling. Thread ribbon through the opening and glue down.
I stenciled each letter on using a gold pen so that you wouldn't be able to see the original lines once I painted over. Then I used my gold leaf paint to fill in the letter. I removed the silver top and spray painted it gold to match the letter. Then took out the hook clasp {I didn't like how you could see it through the clear ornament}, and thread a red ribbon through the holes for a pop of color. Done and done. Each ornament cost me a whopping $0.80.
 You could also spray paint the ornament and then add the monogram to give it a little flare. I was a fan of the simplicity of this one though.
Sharpie Mug
You may have seen my post on this last year, and it was so easy, I decided to do it again! This time, I pulled from Crate and Barrel's new Fa La La Dinnerware Collection, but added my own personal touch.
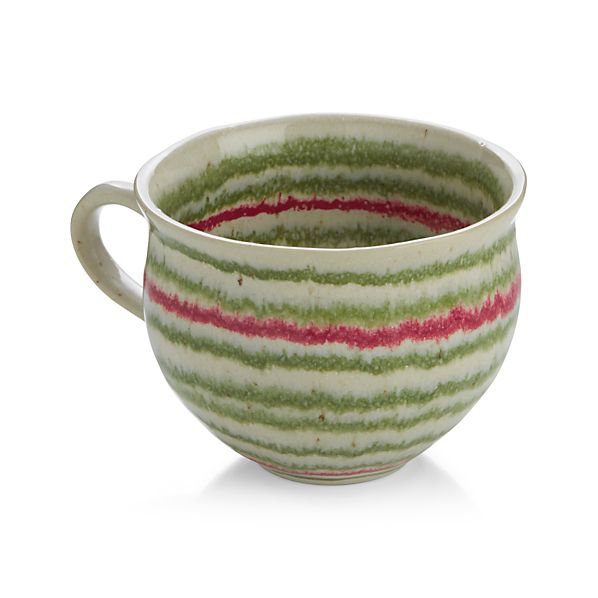 I inscribed "happy holidays" into the design to make it just a little more Fa La La Lovely {sorry, I know. Terrible}.

 Hot Chocolate Gift Box
Now that I had created the mug, I needed to add a few things to complete it as a gift. I saw some delicious hot chocolate recipes here and decided to make them into a gift.
 We had most of the ingredients on hand so this was fairly easy. I did not include the milk because this gift is being shipping so they will have to add that on their own. I filled cellophane bags with the ingredients for each recipe and sealed them with holiday stickers.
 Then I placed them in little take-out boxes. I used Washi Tape and my label maker to label each box.
 Of course a little bottle of Bailey's needed to be added for the Irish hot chocolate, and it all fit perfectly.
Cork Wreath
I was planning to share this post on Monday, but then I started this little project and decided to postpone so I could share it with you. I made an ornament wreath last year and despite my best efforts to store it nicely and in a safe space, it didn't survive the off season. So I decided to make a new one this year, using wine corks.
 Little confession, those wine corks are from actual bottles of wine that have been consumed in my presence. I, of course, had limited influence on how quickly they were consumed. Basically, I've been keeping wine corks in a large bowl for about six years, just as a decoration, and now I'e decided to do something different with them.
 I used a hot glue gun to glue the corks to a wreath form, literally just gluing and sticking however they fit. Then I added a bow from a spare piece of ribbon. Super simple, super fast. I'm just terrified it's going to go collapsing to the ground soon. I have some issues with trusting things that hang, defying gravity, no matter how many supports I add.
 Christmas Tree Card Holder
I am definitely saving the best for last here. This is by far my favorite project this year. Brit and I have never had a set location for storing our holiday cards when they come rushing in. So this year we created these bad boys!
 We cut 3 pieces of wood (26x26x16), then angled the ends using this website to help get the correct measurements.
 With some of the scraps, we cut pieces for the base, or trunk, of the tree. The angles are not perfect, {Brit said it's a failure because of the angles}, but we don't have an angle cutter so this was done by eyeballing it and using a printed protractor. I'm beyond impressed with the outcome so they are proudly on display in our home!
 So Brit cut, I painted and added some twine, and now we have two gorgeous ways to display our cards.
 I used gorilla wood glue to glue the pieces together. The twine is held on using a glue gun and I placed some spare buttons over top to make it a little more attractive.
So those are the little holiday projects we've been up to. What have you DIY'd this holiday season? Have you been inspired to recreate anything for less?
Thanks for visiting!
This time of year we receive close to 10 catalogs a week filled with amazing holiday decorating and gift ideas. I flip through and wish I had a money tree so I could fill our home with all of these amazing holiday decorations.
Letter Ornaments
I saw these adorable ornaments in one of the eight thousand Pottery Barn catalogs we've received thus far {is there an unsubscribe button on catalogs?}. I love it's simplicity and charm, and how it sparkles on the tree. I love it so much, I decided to make some for a few people on my gift list.
Stencil the letter, or letters, you want to use on a piece of cardboard, sturdy paper, or a paper plate {which is what I used}. Cover it with glue. Add glitter.
Brit calls glitter the herpes of crafts, so I sprayed mine with some shellac to prevent the glitter from falling off and getting everywhere. It made the ornament more durable as well.
These are another inspiration from Pottery Barn. I picked up a 6-pack of ornaments from Michael's for $3 and created my own.
I stenciled each letter on using a gold pen so that you wouldn't be able to see the original lines once I painted over. Then I used my gold leaf paint to fill in the letter. I removed the silver top and spray painted it gold to match the letter. Then took out the hook clasp {I didn't like how you could see it through the clear ornament}, and thread a red ribbon through the holes for a pop of color. Done and done. Each ornament cost me a whopping $0.80.
Sharpie Mug
You may have seen my post on this last year, and it was so easy, I decided to do it again! This time, I pulled from Crate and Barrel's new Fa La La Dinnerware Collection, but added my own personal touch.

To make your own Sharpie Mug follow these easy steps:
Create your design, bake in a preheated oven {at 400 degrees} for 20 minutes. Turn off the oven, but leave the mug inside until the oven cools. This usually takes 1-2 hours.
That's it! Now your mug is ready for use! I would refrain from putting it in a dishwasher or severely scrubbing it. I have heard that they can withstand this type of use, but I'm not willing to try! 
Now that I had created the mug, I needed to add a few things to complete it as a gift. I saw some delicious hot chocolate recipes here and decided to make them into a gift.

Cork Wreath
I was planning to share this post on Monday, but then I started this little project and decided to postpone so I could share it with you. I made an ornament wreath last year and despite my best efforts to store it nicely and in a safe space, it didn't survive the off season. So I decided to make a new one this year, using wine corks.
**Note: this project did require us to use a table saw. However, Home Depot and some other home improvement stores will cut wood free of charge.
So those are the little holiday projects we've been up to. What have you DIY'd this holiday season? Have you been inspired to recreate anything for less?
Thanks for visiting!

I like your trees for displaying cards, I also shared a Christmas Card DIY.
ReplyDeleteHi Marilyn - For some reason my previous response never submitted {embarrassing on my own site}. Anyway, I loved you're card placemats! What a great idea! I will definitely try to use that in the future, thanks for reading!
Deletexo Stef